Publishing a PostGIS Table
This tutorial walks through the steps of publishing a PostGIS table with GeoServer.
Note
This tutorial assumes that GeoServer is running at http://localhost:8080/geoserver.
Note
This tutorial assumes PostGIS has been previously installed on the system.
Getting Started
Download the zip file
nyc_buildings.zip. It contains a PostGIS dump of a dataset of buildings from New York City that will be used during in this tutorial.Create a PostGIS database called “nyc”. This can be done with the following command line:
createdb -T template_postgis nyc
If the PostGIS install is not set up with the “postgis_template” then the following sequence of commands will perform the equivalent:
...Unzip
nyc_buildings.zipto some location on the file system. This will result in the filenyc_buildings.sql.Import
nyc_buildings.sqlinto thenycdatabase:psql -f nyc_buildings.sql nyc
Create a Data Store
The first step is to create a data store for the PostGIS database “nyc”. The data store tells GeoServer how to connect to the database.
In a web browser navigate to http://localhost:8080/geoserver.
Navigate to .
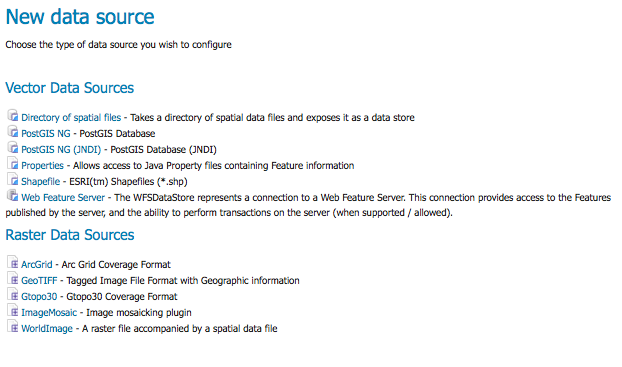
Adding a New Data Source
Create a new data store by clicking the
PostGIS NGlink.Enter the Basic Store Info. Keep the default Workspace, and enter the Data Source Name as
nyc_buildingsand a brief Description.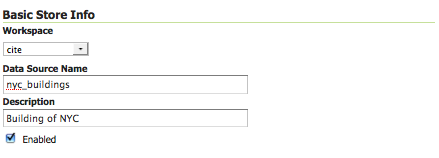
Basic Store Info
Specify the PostGIS database Connection Parameters
dbtypepostgisng hostlocalhost post5432 databasenyc schemapublic userpostgres passwdenter postgres password validate connectionsenable with check box Note
The username and password parameters are specific to the user who created the postgis database. Depending on how PostgreSQL is configured the password parameter may be unnecessary.
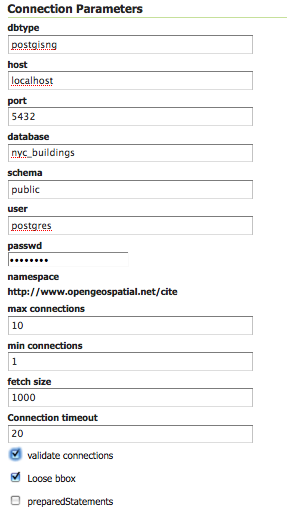
Connection Parameters
Click Save.
Create a Layer
Navigate to .
Click Add a new resource.
From the New Layer chooser drop-down menu, select
cite:nyc_buidings.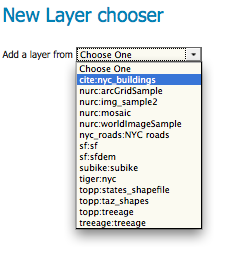
New Layer drop down selection
On the resulting layer row, select the layer name
nyc_buildings.
New Layer row
The Edit Layer page defines the Data and Publishing parameters for a layer. Enter a short Title and an Abstract for the
nyc_buildingslayer.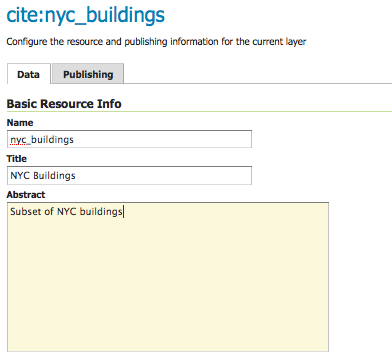
Basic Resource Info
Generate the layer’s bounding boxes by clicking the Compute from data and then Compute from Native bounds.
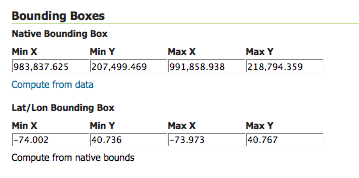
Generate Bounding Boxes
Set the layer’s style by switching to the Publishing tab.
Select the polygon style from the Default Style drop down list.
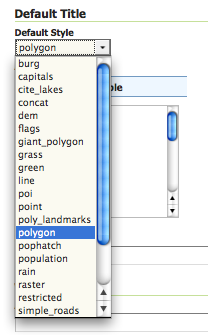
Select Default Style
Finalize the layer configuration by scrolling to the bottom of the page and clicking Save.
Preview the Layer
In order to verify that the
nyc_buildingslayer is published correctly you can preview the layer. Navigate to the Layer Preview screen and find thecite:nyc_buildingslayer.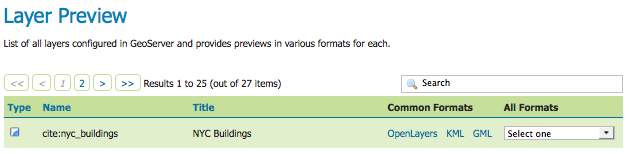
Layer Preview
Click on the OpenLayers link in the Common Formats column.
Success! An OpenLayers map loads in a new page and displays the layer data with the default polygon style. You can use the Preview Map to zoom and pan around the dataset, as well as display the attributes of features.
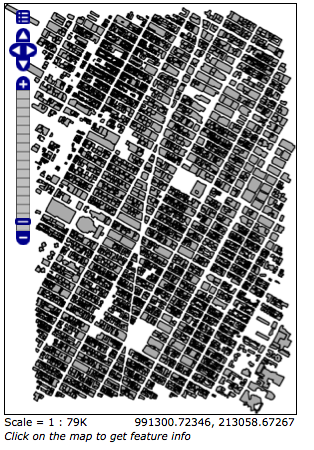
Preview map of nyc_buildings