Setting the Oracle JVM
We recommend using the Oracle JVM with OpenGeo Suite, as testing has shown that the Oracle JVM is significantly faster than other JVM implementations.
Specifically, we recommend using Oracle JRE 7. Even though it isn’t the latest version, it is the most well-tested and stable version of the JVM with GeoServer.
Determining the current Java version
You may wish the verify the version of Java you are currently using.
Warning
On Linux, packages may pull in multiple versions of the JRE, so just running java -version may not accurately reflect the version of the JRE being used by OpenGeo Suite.
To confirm the version of Java used:
Log in to the GeoServer admin interface.
Navigate to the Server Status page, found on the left side under About & Status.
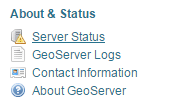
Click to open the Server Status page
The JRE used by GeoServer is listed in the JVM Version entry.
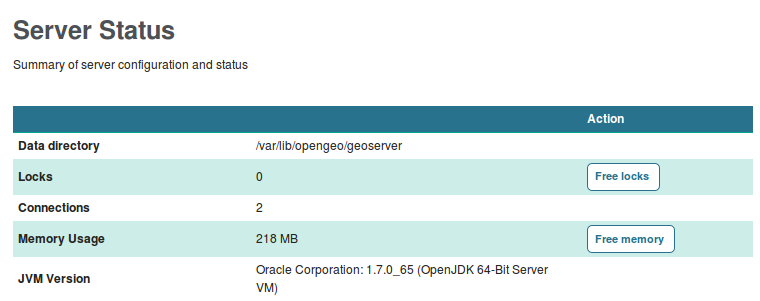
JVM Version showing OpenJDK 7
Note
When using Tomcat, an alternate way of checking the JRE is to log into the Using Tomcat Manager and view the settings there.

JVM settings in Tomcat
Changing to the Oracle JRE
Windows and OS X installers
OpenGeo Suite for Windows and OS X include the Oracle JRE 7 by default, so no action is needed.
Linux
Download the Oracle JRE. In your browser, navigate to Oracle’s download page for JRE 7.
Click the radio box to accept the license agreement and then click the download link that matches your system:
jre-7u76-linux-x64.tar.gz
Extract the download file contents to your temporary directory or desktop.
In a terminal, change to the directory that contains the extracted folder.
Move this directory to
/usr/lib/jvm(or wherever you’d like to place your JRE):sudo mv jre1.7.0_76 /usr/lib/jvm(Optional) Change your
JAVA_HOMEenvironment variable to point to this new directory:export $JAVA_HOME=/usr/lib/jvm/jre1.7.0_76Ensure your application server is using this new Java. Many application servers will pick up the system
JAVA_HOMEenvironment variable or require that their service definition be modified.If using OpenGeo Suite packages (or just using Tomcat) open
/etc/default/tomcat7in a text editor.Scroll down to the end of the file where the
JAVA_HOMEvariable is set. Add the line:OPENGEO_OPTS="-Djava.awt.headless=true -Xms256m -Xmx768m -Xrs -XX:PerfDataSamplingInterval=500 -XX:MaxPermSize=256m -Dorg.geotools.referencing.forceXY=true -DGEOEXPLORER_DATA=/var/lib/opengeo/geoexplorer" JAVA_OPTS="$JAVA_OPTS $OPENGEO_OPTS" JAVA_HOME=/usr/lib/jvm/jre1.7.0_76
Save and close the file.
Restart Tomcat.
OpenGeo Suite should now be using the new version of Java. Verify in GeoServer by navigating to the Server Status page.
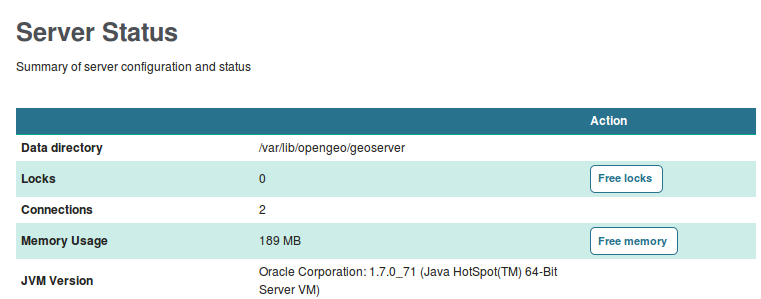
JVM Version showing Oracle JRE on Linux
On the line named JVM Version, you should see the Oracle JRE. (For historical reasons, it will be shown as “Java HotSpot.”)
Note
Read more about running OpenGeo Suite in Production.
Windows application servers
Note
As mentioned above, OpenGeo Suite for Windows automatically includes the appropriate JRE. No action is needed.
If running OpenGeo Suite for Application Servers on a Windows system:
Download the Oracle JRE. In your browser, navigate to Oracle’s download page for JRE 7.
Click the radio box to accept the license agreement and then click the download link that matches your system:
jre-7u76-windows-x64.exe
Use the installer (or manual directions) to update Java.
Warning
When installing a new Java Runtime Environment from Oracle, pay careful attention to the installation wizard. Oracle has a habit of including unwanted extras such as JavaFX and browser toolbars, so make sure you uncheck everything during the install process.
(Optional) Change your
JAVA_HOMEenvironment variable to point to this new directory. From the System Control Panel select Advanced System Settings. From the System Properties dialog navigate to the Advanced Tab and click Environment Variables. Define a System Variable by clicking New and entering:New System Variable¶ Variable name Variable value JAVA_HOME C:\Program Files\Java\jre7Restart your application server.
Make sure that your application server is using this new Java. It may be reading the
JAVA_HOMEenvironment variable, or you may need to consult your application server documentation.OpenGeo Suite should now be using the new version of Java. Verify in GeoServer by navigating to the Server Status page.
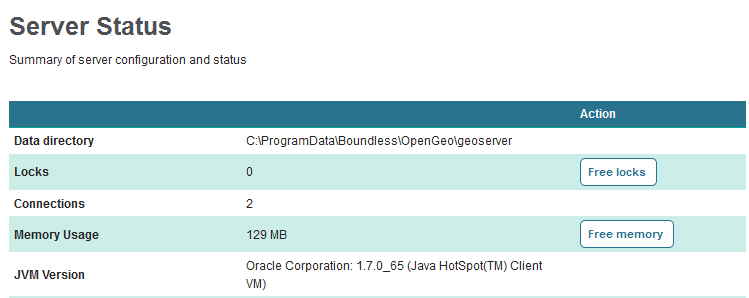
GeoServer Server Status page showing Oracle JRE on Windows
On the line named JVM Version, you should see the Oracle JRE. (For historical reasons, it will be shown as “Java HotSpot.”)
Note
Read more about running OpenGeo Suite in Production.