Plugin with action only
The first example plugin will contain only an action, with no output. Specifically, the plugin will add a button called “Draw Box” to the toolbar which when clicked will allow the user to draw a rectangle on the map.
New application setup
To begin, create a new application and run it in debug mode.
Note
Please see the section on Creating and deploying apps with Boundless SDK for details about creating a new application. This tutorial will assume an application called “myapp”.
OS X / Linux:
suite-sdk create ~/myapp gxp
suite-sdk debug ~/myapp
Windows:
suite-sdk create "%USERPROFILE%\myapp" gxp
suite-sdk debug "%USERPROFILE%\myapp"
Verify in the browser that the application is running successfully by navigating to
http://localhost:9080/, replacinglocalhostwith the name of the host where the SDK is being served.
Creating a basic plugin
In the
src/appdirectory inside the application, create apluginsdirectory.In a text editor, create a new file called
DrawBox.jsin thepluginsdirectory. This file will contain the plugin code.Add the following content to
DrawBox.js:/** * @require plugins/Tool.js */ Ext.ns("myapp.plugins"); myapp.plugins.DrawBox = Ext.extend(gxp.plugins.Tool, { ptype: "myapp_drawbox", addActions: function() { return myapp.plugins.DrawBox.superclass.addActions.apply(this, [{ text: "Draw box" }]); } }); Ext.preg(myapp.plugins.DrawBox.prototype.ptype, myapp.plugins.DrawBox);
As for user interaction, this code will only add a button to the toolbar with the text “Draw box”. This button will not have any functionality. Also, the final line registers the
ptypename as a shortcut for creating the plugin.Note
This example sets a namespace for the plugin called “myapp”, but this can be changed, so long as any new namespace is used consistently throughout. In addition, we recommend you include a prefix on the name of the ptype that matches the namespace, but this is not required.
Note
Find out more about the Tool.js plugin in the SDK API.
Connect plugin to application
Now that the plugin has been created, it must be connected to the application. Open
src/app/app.jsand add a dependency at the top:* @require plugins/DrawBox.js
In the
toolsconfiguration section of the file add the following item to the bottom of the list:}, { ptype: "myapp_drawbox", actionTarget: "map.tbar" }],
This tool will place the draw box button in the Map Window toolbar of the map.
Save this file.
Since a new dependency was added, the application will need to be restarted to see the changes. In the terminal, type CTRL+C to stop the SDK and then run the debug command again.
Reload the application in the browser. You should now see a new button in the toolbar titled Draw box.
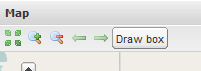
Draw box button
Adding functionality
The Draw Box button currently does nothing, so the next step is to add some functionality to it.
Open
DrawBox.jsfor editing again. Replace the existingaddActionsfunction with the following:addActions: function() { var map = this.target.mapPanel.map; this.boxLayer = new OpenLayers.Layer.Vector(null, {displayInLayerSwitcher: false}); map.addLayers([this.boxLayer]); // keep our vector layer on top so that it's visible map.events.on({ addlayer: this.raiseLayer, scope: this }); var action = new GeoExt.Action({ text: "Draw box", toggleGroup: "draw", enableToggle: true, map: map, control: new OpenLayers.Control.DrawFeature(this.boxLayer, OpenLayers.Handler.RegularPolygon, { handlerOptions: { sides: 4, irregular: true } } ) }); return myapp.plugins.DrawBox.superclass.addActions.apply(this, [action]); },
This code pulls in an OpenLayers.Control.DrawFeature control that will allow you to draw rectangular geometries on the map. It also creates a vector layer that holds the boxes that are being drawn by the
OpenLayers.Control.DrawFeaturecontrol. ThehandlerOptionsspecified ensure that only rectangular geometries can be drawn.The layer that contains the drawn boxes should always remain visible even when new layers get added to the map. To accomplish this, the
raiseLayerfunction is called as a listener for theaddlayerevent on the map. This function callssetLayerIndexto set the index for the new layer to the highest number (based on the total number of layers in the map). This ensures the new layer will be drawn last, superimposed over any other layers.Add the following code to the
DrawBox.js:raiseLayer: function() { var map = this.boxLayer && this.boxLayer.map; if (map) { map.setLayerIndex(this.boxLayer, map.layers.length); } }
Since these functions depend on additional classes from OpenLayers and GeoExt, these dependencies must be added to the top of
DrawBox.js:* @require GeoExt/widgets/Action.js * @require OpenLayers/Control/DrawFeature.js * @require OpenLayers/Handler/RegularPolygon.js * @require OpenLayers/Layer/Vector.js * @require OpenLayers/Renderer/SVG.js * @require OpenLayers/Renderer/VML.js
Note
While it is possible to add these dependencies to
src/app/app.jsinstead ofDrawBox.js, it is preferable to keep the plugin dependencies with the plugin file to clarify where the dependencies are used.Restart the SDK and reload the application in the browser to see the code in effect.
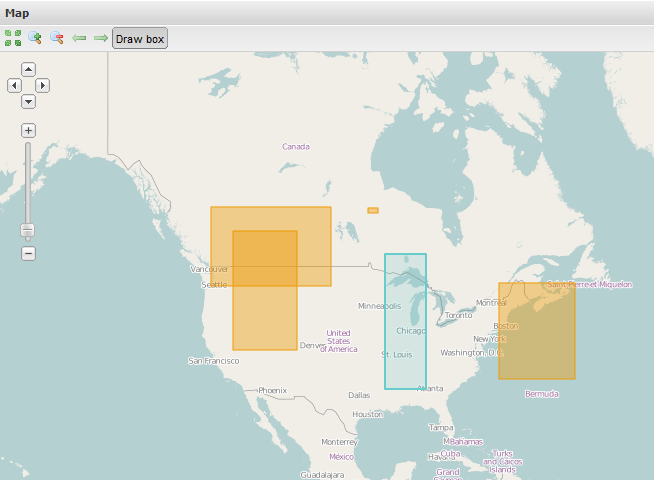
Drawing boxes
Download the DrawBox.js and app.js files created in this section.