Building web map applications with OpenLayers 3
This section will show you how to deploy a simple web mapping application using OpenLayers 3.
OpenLayers is a JavaScript library that allows for putting a dynamic map in any web page. It can display map tiles and markers loaded from any source.
The latest version of OpenLayers, OpenLayers 3, consists of a full rewrite of the code, greatly simplifying syntax and making map creation easier.
Note
For building applications with Boundless SDK OpenLayers 3 templates, please see OpenLayers 3 SDK templates.
Complete working example
Here is a complete working example of a map on a web page.
<!doctype html>
<html lang="en">
  <head>
    <link rel="stylesheet" href="http://ol3js.org/en/v3.0.0-beta.1/build/ol.css" type="text/css">
    <style>
      .map {
        height: 400px;
        width: 100%;
      }
    </style>
    <script src="http://ol3js.org/en/v3.0.0-beta.1/build/ol.js" type="text/javascript"></script>
    <title>OpenLayers 3 example</title>
  </head>
  <body>
    <h2>My Map</h2>
    <div id="map" class="map"></div>
    <script type="text/javascript">
      var map = new ol.Map({
        target: 'map',
        layers: [
          new ol.layer.Tile({
            source: new ol.source.MapQuestOpenAerial()
          })
        ],
        view: new ol.View2D({
          center: ol.proj.transform([37.41, 8.82], 'EPSG:4326', 'EPSG:3857'),
          zoom: 4
        })
      });
    </script>
  </body>
</html>
View this map
To view this example, create a new file called map.html, copy the contents of the above into this file, and save it in the apps directory. This directory is usually found here:
Windows:
C:\Program Files\Boundless\OpenGeo\jetty\webapps\apps\
Mac OS X:
~/Library/Application Support/GeoServer/jetty/webapps/apps/
Linux:
/usr/share/opengeo/apps/
Next, open that file in a browser. Assuming OpenGeo Suite web applications deployed at http://localhost:8080, this file should be viewable at http://localhost:8080/apps/map.html.
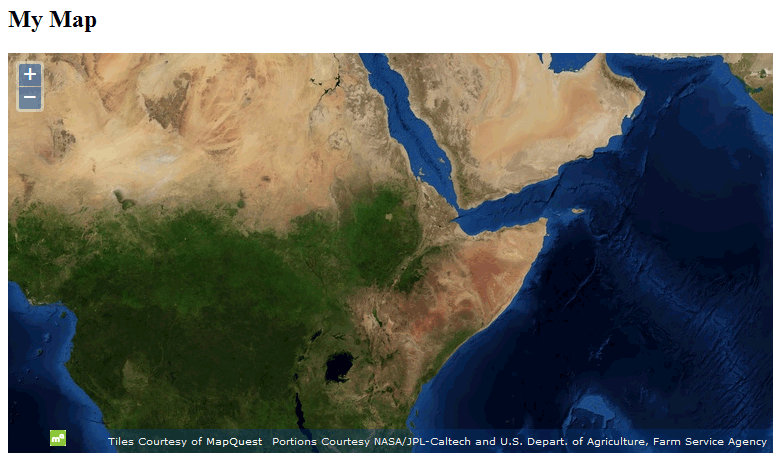
OpenLayers 3 map
Details
There are three components to including a map in a web page:
- Include the OpenLayers library
<div>map container- JavaScript to create a simple map
Include the OpenLayers library
<script src="http://ol3js.org/en/v3.0.0-beta.1/build/ol.js" type="text/javascript"></script>
The first step is to include the JavaScript library. For the purpose of this tutorial, here we simply point to the library hosted at ol3js.org. In a production environment, we would build a custom version of the library including only the module needed for our application.
<div> map container
<div id="map" class="map"></div>
The map in the application is contained in a <div> HTML element. Through this <div> the map properties like width, height, and border can be controlled through CSS. This is the CSS element used to make the map 400 pixels high and as wide as the browser window:
<style>
  .map {
    height: 400px; width: 100%;
  }
</style>
JavaScript to create a simple map
var map = new ol.Map({
  target: 'map',
  layers: [
    new ol.layer.Tile({
      source: new ol.source.MapQuestOpenAerial()
    })
  ],
  view: new ol.View2D({
    center: ol.proj.transform([37.41, 8.82], 'EPSG:4326', 'EPSG:3857'),
    zoom: 4
  })
});
With this JavaScript code, a map object is created with a MapQuest Open Aerial layer zoomed on the African East coast. Let’s break this down:
The following line creates an OpenLayers Map object. Just by itself, this does nothing since there are no layers or interaction attached to it.
var map = new ol.Map({ ... });
To attach the map object to the <div>, the map object takes a target into arguments. The value is the id of the <div>:
target: 'map'
The layers: [ ... ] array is used to define the list of layers available in the map. The first and only layer right now is a tiled layer:
layers: [
  new ol.layer.Tile({
    source: new ol.source.MapQuestOpenAerial()
  })
]
Layers in OpenLayers 3 are defined with a type (Image, Tile or Vector) which contains a source. The source is the protocol used to get the map tiles. You can consult the list of available layer sources.
The next part of the Map object is the View. The view allows you to specify the center, resolution, and rotation of the map. Currently, only View2D is supported. The simplest way to define a view is to define a center point and a zoom level. Note that zoom level 0 means zoomed out.
view: new ol.View2D({
  center: ol.proj.transform([37.41, 8.82], 'EPSG:4326', 'EPSG:3857'),
  zoom: 4
})
You will notice that the center specified is in lat/lon coordinates (EPSG:4326). Since the only layer we use is in Spherical Mercator projection (EPSG:3857), we transform the coordinates to be able to zoom the map on the right coordinates.